Makeup Tips

Confused about which flirty falsies to wear for that special night out?
Amidst the sea of lashes in the world, there are a few brands we always turn to. A higher price tag does not necessarily mean higher quality and some of the best are available from your local drugstore. Here are a few tips on what we look for in a good pair of falsies:

There are three main criteria for makeup on the go: portability, ease of use, and multitasking. Well there's also a fourth - it has to make you look good. Here are a few beauty tips and tricks I would recommend if you're the type of gal who would rather take the time to sleep and slap on your face on the commute to work be it train tram or tube... Not speaking from experience, of course...
1.) Foundation - Pick a formula that is easy to apply with the fingers. Or better yet if you're the lucky gal to have more good skin days than bad, take with you a concealer to dab on only on problem areas. For on the go I recommend wand products that allow controlled spot applications but can double up as foundations such as MAC Mineralize concealer or NARS Radiant Creamy Concealer. I would apply this on the eye bags spots, around my nose and mouth, and blend with the fingers.
2.) Powder - I'm one of those believers in setting my face base with powder. I don't touch up during the day so powder is a must for me. There is no trick around this - I take powder on one hand and a brush (preferably a stippling brush) on the other. The powder has to be pressed powder though - you don't want loose powder puffing up in smoke on the other passengers!
3.) Lips and cheeks - opt for multitasking cream products with pops of colour. For easy finger applications I would pick creamy but solid formulas. Mac Cream Colour Bases and NARS Multiples are fabulous for this. The new YSL Kiss and Blush are also good alternatives.
4.) Eyes - I say skip the brushes, powders and pots in place for eye pencils or felt tip pens. That includes eyeshadow, eyeliner and eyebrows. Take note of creamy yet long-wearing Charlotte Tilbury eyeshadow pencils. Even liquid liners can cause more trouble, avoid those too.
5.) Mascara - unless the commute is particularly bumpy I would suggest perfecting your mobile mascara technique. There's no way getting around this one.
So these are my basic tips and recommendations for on the go beauty. Fellow commuters would be amazed at your before and after transformation, and I'm sure closet beauty addicts would have difficulty keeping their eyes off you and your arsenal... with makeup bag envy!


Does your
makeup bag need an update?
"What makeup should I buy?"
Makeup isn’t
cheap, especially good quality ones. Through the process of building one’s kit,
we waste a lot of hard earned cash on trial and error, but what if there was a
recommended list of products we should check out first? After perusing the
makeup bags of several of my good friends while doing their makeup, I realized that
a lot of us need help out there to build their initial makeup kits and that is
what this post is going to be about. This post is also useful for those with established makeup bags looking to try new makeup. Welcome to my guide to building your
perfect personal makeup kit.
.jpg)
Do you suffer from red cheeks, sallow skin, dark under eye circles or does your skin just need a bit of a glow?
MAC Cosmetics are launching the MAC Prep + Prime Colour Correct Collection designed to fix our uneven skin tone woes with the use of coloured powders and creams. Powders will be available as loose powders and pressed compacts. These colours will be available in cream form that come with SPF 30.
Correctors are different from concealers. Correctors act to neutralise colour, whereas concealers act to cover up. You can use them both in looks or one or the other depending on your skin's needs.
I like using these types of products underneath my overall foundation or face powder.
I like using these types of products underneath my overall foundation or face powder.
How to colour correct using makeup

Want to avoid makeup mayhem this holiday season? Here are our tips to help you look your best in your photos this Christmas!


Dolce & Gabbana, Valentino, DKNY
To get this look:
1. Moisturise your skin. I use 2 sprays of NUXE Huile Prodigieuse oil to cover my entire face and neck.
2. Mix 1 pump of Sleek Makeup New Skin Revive Foundation and 2 pumps of MAC Oil Control Lotion.
1. Moisturise your skin. I use 2 sprays of NUXE Huile Prodigieuse oil to cover my entire face and neck.
2. Mix 1 pump of Sleek Makeup New Skin Revive Foundation and 2 pumps of MAC Oil Control Lotion.
3. With a MAC 188 brush or fingertips, apply and blend the mixture all over the face and neck,
4. Highlight the bridge of your nose, cheekbones, and underneath the eyebrows with a creamy highlighter - I love using MAC Pearl Cream Colour Base.
Tidy your brows, put on mascara, blush and some lip balm - and you're good to go!
.JPG)
Here I am using all the products mentioned above, including Bourjois Queen Attitude Mascara
Etude House Brow Pencil, NARS Deep Throat Blush and MAC Cut a Caper Lipstick.


Lanvin, Diane von Furstenberg, Versace


Zac Posen, Versace, Etro
Time to grow those brows girls! Bold brows are back!
There are two varieties - big bushy untamed ones, and clean shapely full ones. I much prefer the latter.
If your brows are on the full side - you're in luck!
For ladies with thinner brows opting for this look, I recommend growing your brows (yes leave them alone) for 2 weeks and then go to a professional to have them threaded and reshaped to your preference.
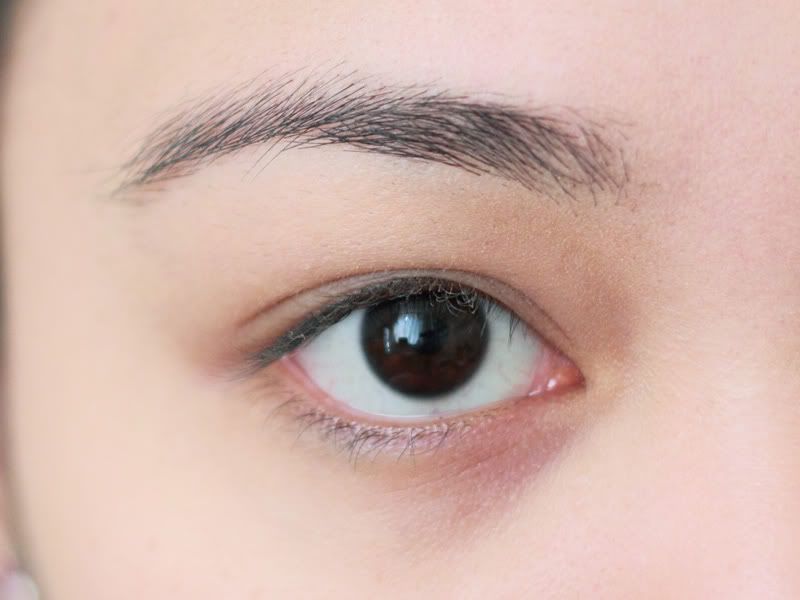
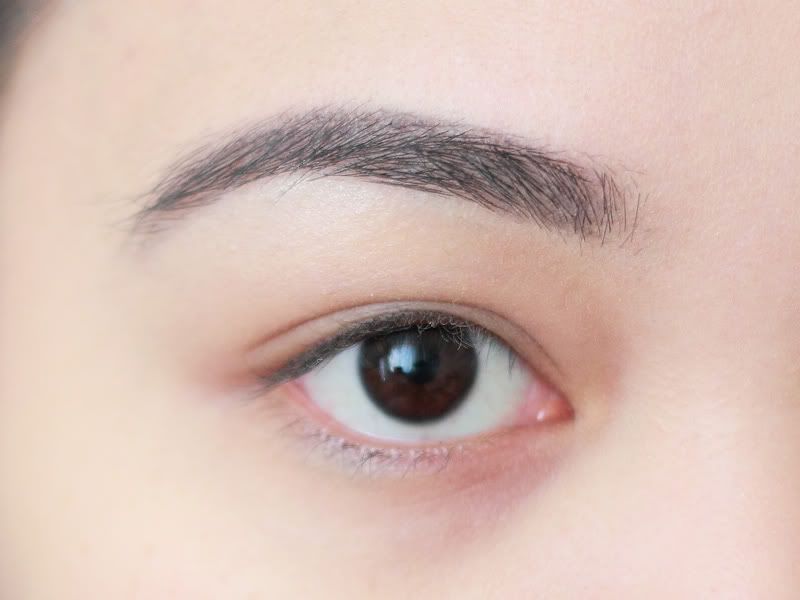
before, after
For tips on getting clean bold brows, read my very extensive Eyebrow Tutorial here: All About Brows | My Eyebrow Tutorial - It includes my tips on eyebrow shaping, trimming, colouring and shading.
Also, here's a link to a quick review of my favourite eye brow pencil: Etude House Drawing Eye Brow Pencil
What do you think of this trend? ♥
Livia xx
Livia xx
Last week, I was invited to the M.A.C BAFTA TV Mock-up Suite event held at the luxurious Corinthia Hotel. MAC Cosmetics is the Official Beauty Partner of the Arqiva British Academy Television Awards - 9th year running!, and MAC Senior Artist Cher Webb gave us a ‘camera ready’ beauty masterclass on this year's looks for the red carpet.
.jpg)
Cher created 2 looks for us:
The first look was a day-time glamour with beautiful radiant skin and light peach lips.
.jpg)
She used MAC Face and Body Foundation (one of my favourites) and the new MAC foundation/concealer palettes (coming soon! can't wait!!) to give a very natural-looking flawless base. For the eyes, MAC Groundwork paint pot was applied on to the eyelids and lower lash line for some colour. MAC Arena eyeshadow (a shimmery natural peach) was dusted over it and, MAC Pro Longwear eye pencil in Lord It Up (brown) was smudged to the top and bottom lash lines. For the cheeks, a beautiful coral shade, MAC Something Special Cremeblend Blush was buffed high up the apples of the cheeks and MAC Pink Rebel Lustre Drops were added to highlight cheekbones. Lips were filled with Boldly Bare lip pencil and MAC To The Future Pro Longwear Lipcreme (the next product on my wishlist!). The look was finished with MAC Mineralised Skinfinish Natural, False Lash Mascara and False lashes.
.jpg)
The second look was the first transitioned into a more sultry chic look with a bold orange lip.
.jpg)
MAC Feline Eye Kohl (now permanent - finally - hurrah!) lined the top and bottom waterlines. MAC Make Your Mark Pro Longwear Eyeshadow was added all over the lids. MAC #3 lashes were added. Lips were lined with MAC Pro Longwear Lip Pencil in What A Blast! and filled with MAC Pro Longwear Lipcreme in Good To Go (must have shade for summer!).
Some notes:
Peach and orange tones are the trend this year! Both the light peach and bright orange lipsticks are must-haves this summer. I also have my eye on Something Special blush.
The MAC Pro Longwear range (as the name implies) offers a lot of long-wearing products. It's great not having to reapply so much especially during important busy occasions.
MAC To The Future Pro Longwear Lipcreme is soo beautiful, especially in person. It brightens up your face!
The ever-recurring limited edition super-black eye pencil, MAC Feline eye kohl, is now permanent!
Primers are important for a smooth application and longer-lasting makeup.
Natural-looking glowy dewy skin is in and super-flattering. I'll leave matte skin for the colder months.


 A rare smiling FOTD photo - I'm actually pretty conscious about my teeth up close, hence the lack of these.

Cher, Our Model, Me
This is one of my most requested and long awaited posts - a tutorial on how I do my brows. It took me a while to do as I found it quite difficult and time-consuming trying to capture the essential steps. Hopefully this tutorial is clear and that you'll find this useful! Feel free to ask me questions if you need to.
Brow Shaping
There are hundreds of 'brow shaping' tutorials in the internet, but if you're a brow shaping novice, I recommend getting your brows professionally shaped. I have my eyebrows threaded and shaped twice a year, and I just maintain the shape by plucking stray hairs that have grown with a pair of tweezers.
I recommend threading rather than shaving as hair tends to grow faster if shaved and therefore tends to be more tedious to maintain. Although threading itself is painful, you tend to develop pain tolerance after a few sessions. Taking 1g of paracetamol 1 hour before may also help, or using an ice pack to numb the area.
Brow Trimming
Brow hair obviously grows and the sometimes can get too long. Most people develop a 'fan' on the inner aspect of their brows as the hairs stick out upwards. Best thing for these is to trim them yourself at home!
I use:

Small eyebrow scissors - any small precise pair of scissors would also work
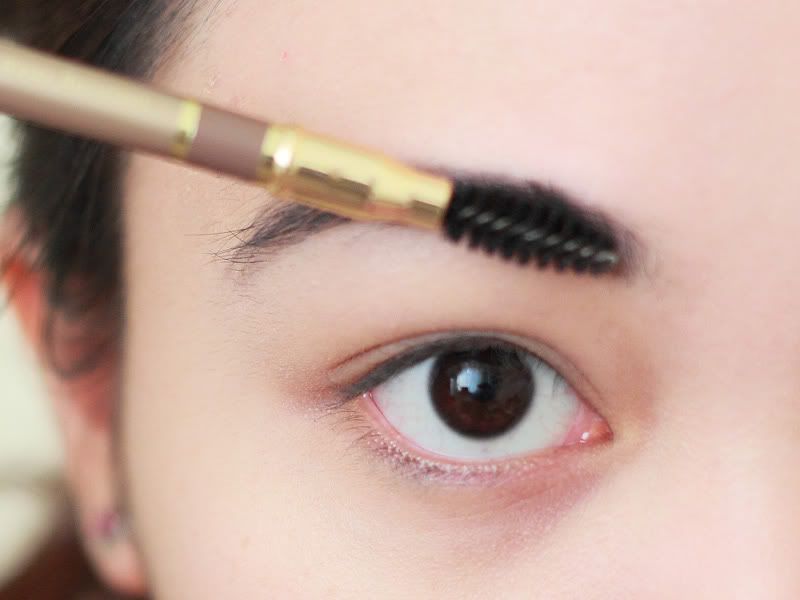
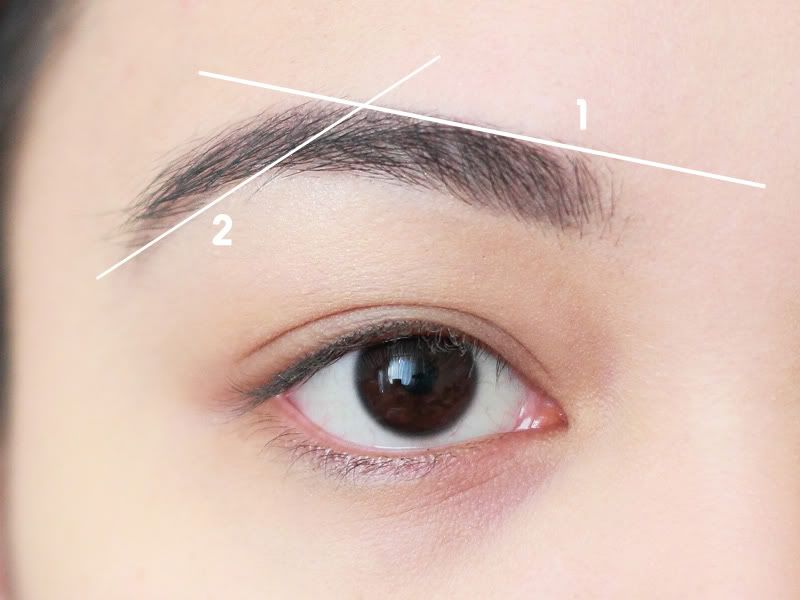
For the inner 2/3 of the brow medial to the brow arch, I brush brow hairs upwards using a spoolie, isolating the hair segments above an imaginary line from the inner part to the arch. I then trim hairs above this line.
For the outer 1/3, this is a bit more tricky. I brush the hairs downwards, trimming the segments below an imaginary boundary on the lower border of the brow.
Finding Your Brow Arch

Source
This picture perfectly demonstrates how I find the start, brow arch, and outer ends of my brows. If you're new to this, I suggest getting a makeup pencil (eye pencil or lip pencil) to mark these points.
Start of Brows
Take a straight object and draw a line from the outer part of your nose and crossing the inner corner of your eye. Trace this on your brow area. Pluck any hairs more medial to this.
Arch
Look straight into a mirror, then take a straight object and line it from the outer part of your nostril, crossing your pupil, towards your brows. Place a mark where your line intersects with your brows.
End of Brows
Take a straight object and draw a line from the outer part of your nose and crossing the outer corner of your eye. Trace this on your brow area. Pluck any hairs more lateral to this.
Brow Colour
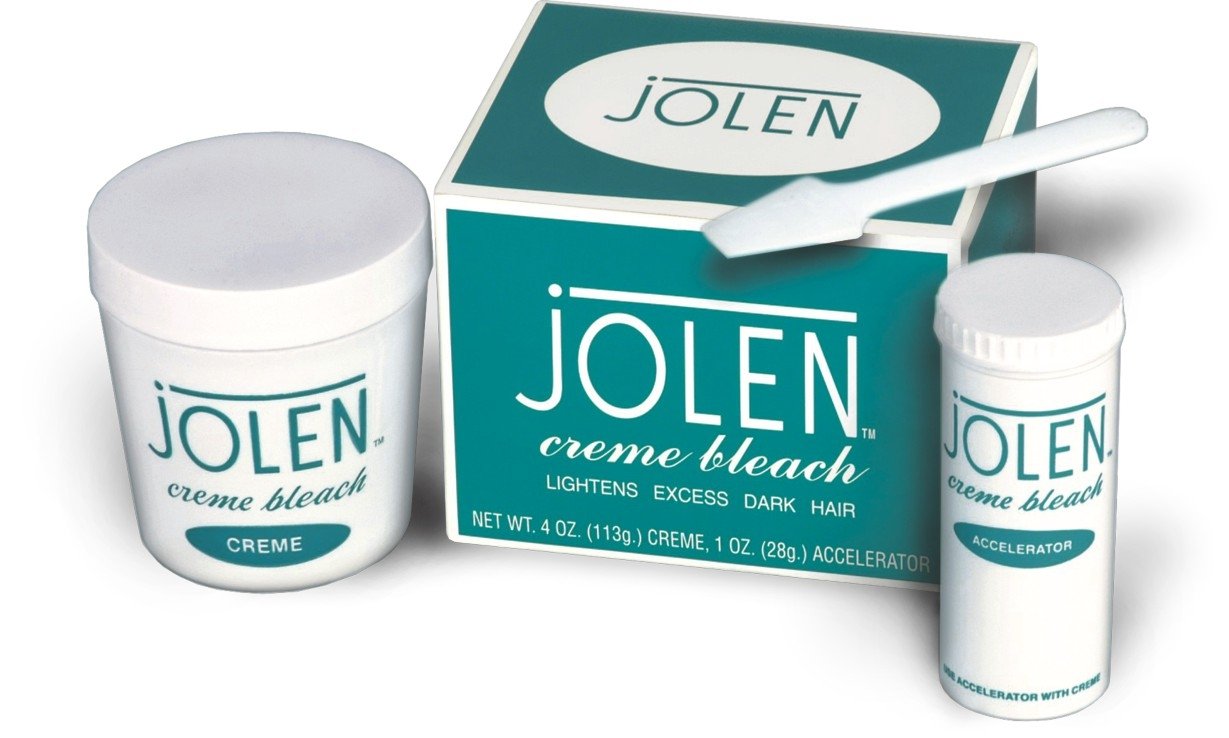
It's said that the brow colour that flatters one the most is 1-2 shades lighter than one's hair colour. In truth, this really depends on the person's preference and brow trends. To bleach my brows, I use JOLEN Creme Bleach. It comes with the Creme bleach (big pot), Powder Accelerator (small pot) and a spatula. You need to mix approximately equal parts cream and powder bleach.
I use the cover of the creme bleach as a mixing tray. I use the scoop of the spatula to take cream bleach and deposit on the tray, then using the thin handle of the spatula, I guide some powder granules of the accelerator on to the bleach. I then mix the two. Once fully mixed and granules dissolved, I carefully apply the mix on my eyebrows, taking care not to involve my eyes. I tend to close the eye underneath the brow I am treating. Make sure you cover the brows fully for even bleaching.
I usually wait about 7 minutes for the bleach to work to get my desired colour. After this, using tissues damp with cold water, I gently wipe the mixture off from the middle to outer parts of my brows.
Brow Makeup
Before & After
For this tutorial, I use and highly recommend:
Etude House Brow Pencil
This comes in several shades from brown to grey to black. I love the slanted applicator and the colour it delivers. Very natural looking. Reviewed here. Of course, other brow pencils will do!
MAC Pearl Cream Colour Base
Highlighters are a must for tidy-looking brows. This is my favourite highlighter. I love the creamy consistency and the luminous finish. Of course you can use any shimmery white or beige.
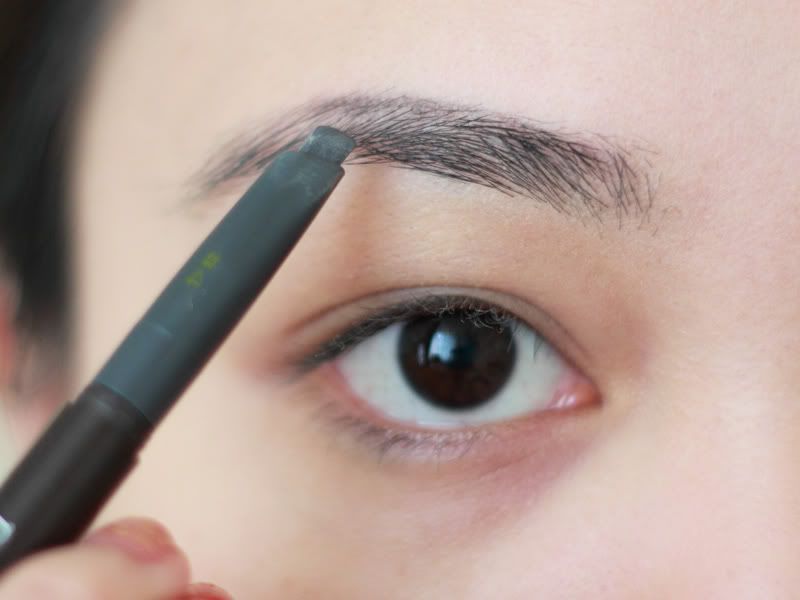
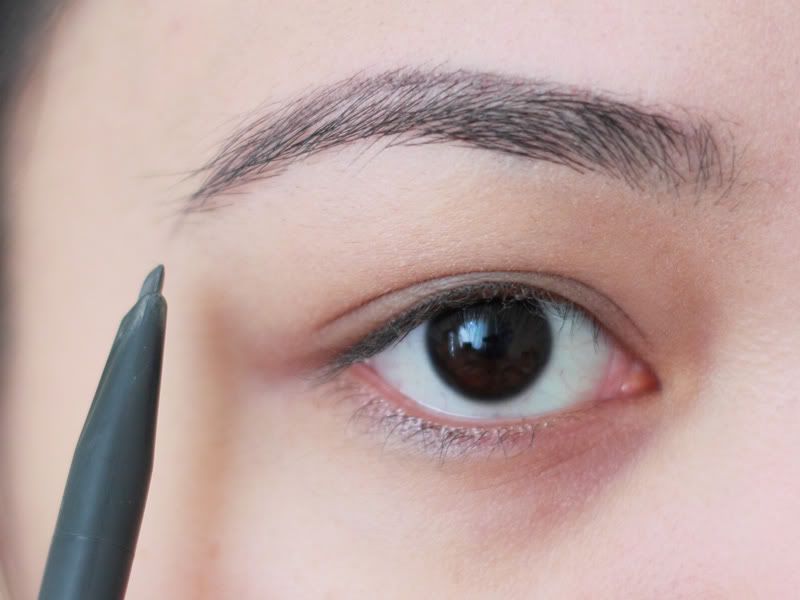
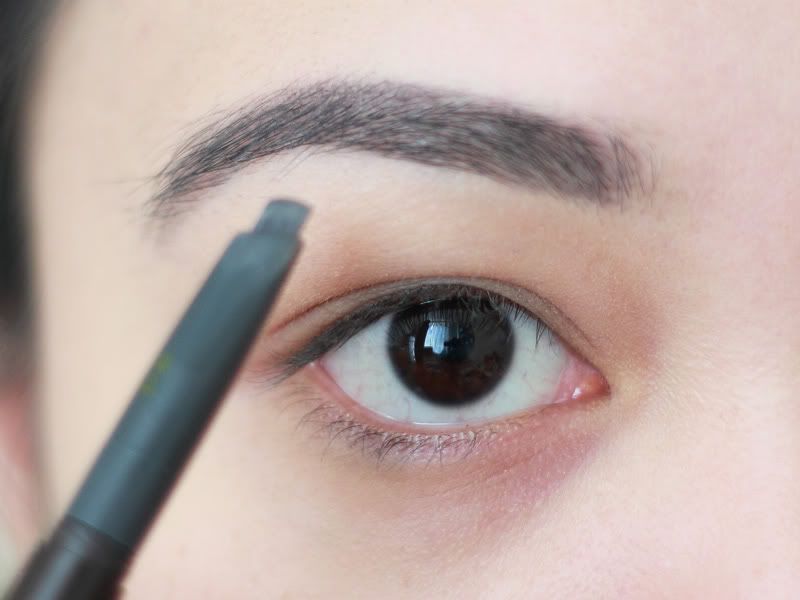
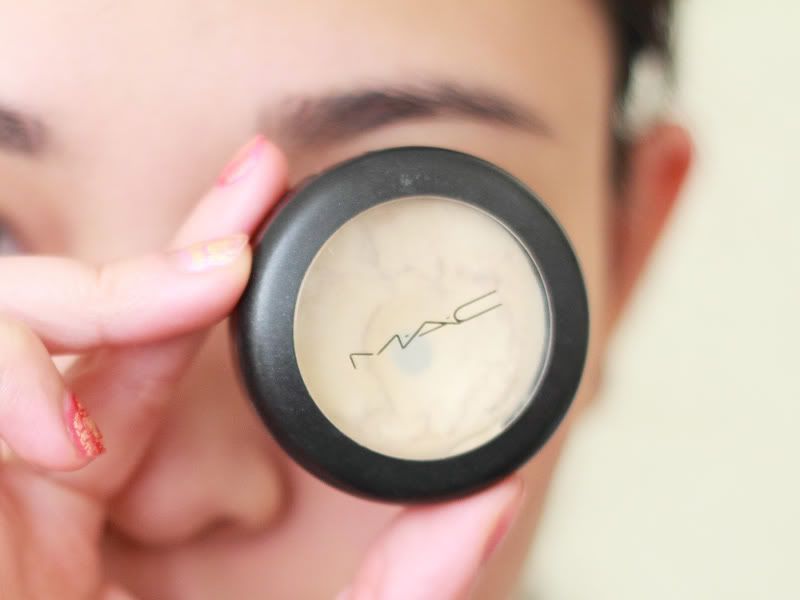
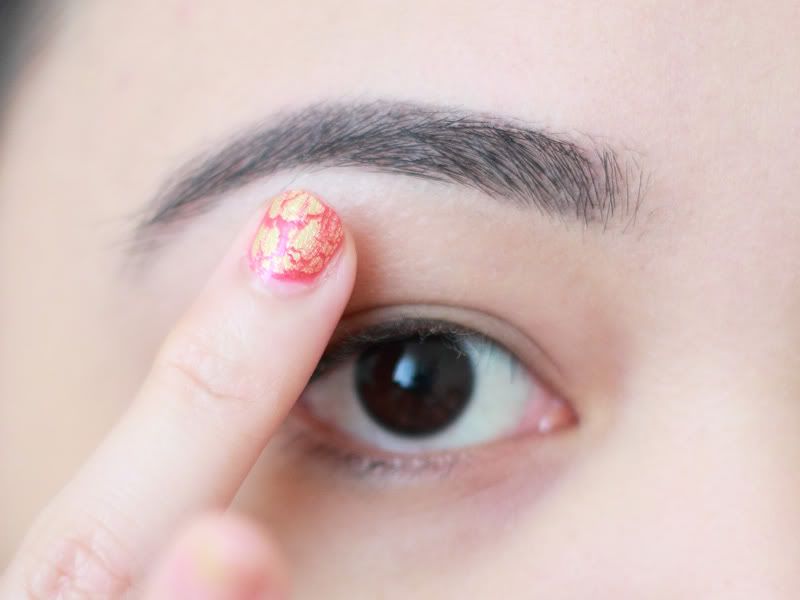
1. Foundation or Face Powder. I usually do my brows after applying face powder or foundation to my face to prevent them being covered or ruined if done the other way around.
2. Take your brow pencil and trace a straight line on the tops of your brows, from the inner side in short light strokes towards the top arch of your brow.
3. Draw a line from your arch towards the tail end of your brow, slightly curving the arch.
4. Fill any spaces between the top arch and the bottom arch with short strokes, mimicking natural hairs. Do not trace the bottom edge of your brows - I find that this makes brows look too thick and harsh.
5. Take your highlighter: MAC Pearl cream colour base
6. With your ring finger, dab and blend a bit just underneath your arch.
Et Voila! Quick clean brows.
That concludes my comprehensive "All About Brows". Let me know if you have any questions or any more requests!
What do you think? ♥
Livia xx
Spoolie (this is the spoolie end of a cheap eyebrow pencil I bought but never use)

Neil, Livia, Lynsey



Subscribe to:
Posts (Atom)







.JPG)
.JPG)


